


Drinking tea is a wonderful way to relax after a hard day. When it’s your own tea, grown in your own container garden, it’s even more of an experience. A hot cup grown from your patio.
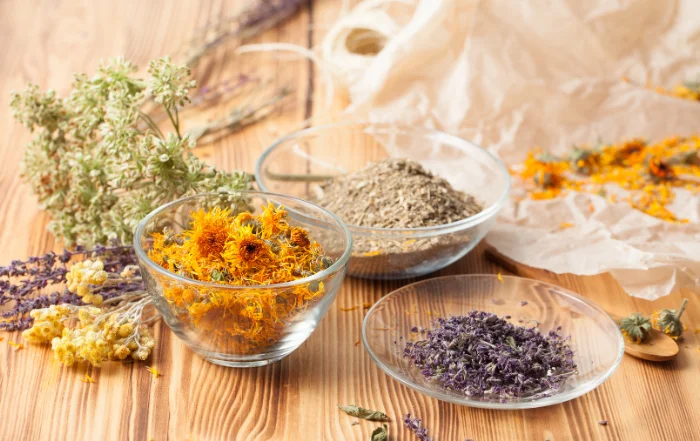
By growing your own tea, you know exactly how it was grown and processed. You’re in control! Your loose tea will only contain fresh, tea leaves, no unwanted additives or old bitter tea leaves.
Tea grows very well in containers, but it does take some time. It takes two to three years for tea plants to reach a harvestable size. Trust me, the time is worth it, as nothing beats the flavor of a tea brewed from leaves that were harvested and dried right there at home.
Let's Get Your Tea Garden Started
The first thing you need to do is choose the location in your yard or on your patio that you want to place your tea plants.
You should pick a location that will allow your tea plants bright but indirect sunlight and good drainage(it’s important that the containers never remain in standing water).
If your location doesn’t have good drainage, use patio pavers to place on each side of your containers to keep them out of any standing water.
Once you have a location picked out, you will need to get your supplies together, a list of supplies is provided below. The supplies can be found in garden centers or online.
The type of container or containers that you select to use is entirely up to you, but it’s best to get containers that are going to allow your tea plant to grow (they can get pretty large, sometimes over 5 feet high), so try to get a container that’s at least twice as large as the seedlings root ball, this will reduce the need to repot the tea plant as much.
Take all of your supplies to the chosen area and let’s get planting.

Tea plants grow best in an acidic soil with good drainage, you want a pH level of 6-6.5, so to make sure your soil has the proper pH level is right, you will need a soil pH test kit to keep track of the level and make any adjustments along the way.
There are a couple of ways to purchase your soil for your container tea garden:
1.
Purchase premade and have it done for you.
Purchase a potting soil that is premixed, meaning it contains vermiculite. Miracle Grow Potting Mix works great. You’ll need to mix some sphagnum peat into the soil to help make it more acidic. The ratio is easy; five parts of the potting mix to every 1 part sphagnum peat (5 to 1).
2.
Buy the ingredients and mix up your own soil.
Buy a large amount of potting soil, vermiculite and sphagnum peat to mix up your own tea-loving soil. The math is easy: 4 parts potting soil, 1 part vermiculite and 1 part sphagnum peat. Give it a good mix and you’re done!
Tea plants need good drainage.
You’ll need to prepare your containers by drilling some extra drainage holes in the bottom, using a drill with a 1/4 inch drill bit.
After drilling the holes, cut a piece of the black mesh window screening to fit the bottom of the container, apply some drops of silicone sealant around the edges of the container (this will hold the mesh in place) and place the screen down.
Remember to let the silicone dry fully before filling with soil.
This will keep the soil in the container but allow the excess water to flow out.
To find your tea plants (camellia sinensis), check with your local nursery or look online for a supplier.
There are two varieties of tea plants to focus on. I’ve explained their differences below. You can use both varieties to make white, green and black teas.
The type of plant you choose will depend primarily on your depth in taste preference.
- Camellia sinensis – This variety produces, hardy, small-leafed teas, they usually have a milder flavor of green and white teas.
- Camellia sinensis var. assamica – This variety produces larger-leafed teas. The assamica variety is used to produce teas with more robust, stronger flavors, like Oblong and Black teas.

Now that the containers are ready, it’s time to fill them with the soil mix. You’ll make a hole large enough for the tea seedlings root ball, and place soil around the tea plant to cover the root ball and the base of the plant.
Water until you see water dripping from the drainage holes.
Don’t forget to have your containers raised on patio pavers if the area tends to allow standing water. You never want your containers in standing water.
To know when it’s time to water, check the soil. The soil should be moist but not wet. Overwatering will cause root rot.
Tea plants don’t require a lot of feedings. You can use a compost tea or organic plant fertilizer every three weeks or so during the spring through summer growing season.
Tea plants often enter a dormant state during the winter, but will grow year round in warm climates.
In cold winters, wrap your plants in protective wrap or move indoors.
You’ll want to prune your tea plants during the plant’s dormant period, regularly in winter months. Pruning has to be done on a regular basis to help your tea bush become bushy. Keep the height down to 3-5 feet to encourage more growth.
To prune your tea plants, remove any dead or damaged leaves and stems using sharp pruning shears. Be sure that you cut the stems down to the base of the plant.

Harvesting & Processing Your Tea
Now that you have patiently given your tea plants three years of great care, it’s time to start harvesting. This is where you receive a reward for your hard work.
To harvest your tea, you’ll need the following; a sharp pair of scissors or pruning shears. The leaves that you harvest will depend on what type of tea you want. Use the information here to choose the leaves you will need for each type of tea and how to process them.
Green tea is made by cutting leaves from the highest part of the plant. This is where the plant receives the most sunlight and develops the most new leaves. Once you have cut the leaves you need, place them on a baking tray in a shady area and let them air dry for a few hours. This begins the drying process. You’ll place the tray of leaves in a 250 degree F oven for about 20 minutes. Allow the leaves to cool completely, then store in an airtight container.
Black tea is made from the larger, more mature leaves on the plant, which are located more towards the bottom of the plant. After cutting the leaves, you will need to roll them in your fingers until they become dark. Now you’re going to spread them out on a baking sheet and place them in a cool location for about three days. After three days, place the tray of leaves in a 250 degree F oven for 20 minutes. Remove the tray of leaves from the oven and let them sit at room temperature until they become richer in color. Store in an airtight container.
More To Discover
- The Many Benefits of a Compost Bin in Your Backyard with Easy DIY Setup
- Don’t Know What to Do with Your Surplus Herbs from Your Herb Garden, Here’s an Idea for You!
- The Best Ways to Attract Beneficial Wildlife to Your Backyard and Garden and Why You Must
- Grow Some Interesting and Conversation Starting Plants You Won’t Find at Your Local Greenhouse
White tea is made from cutting the leaves that haven’t fully opened yet. After the leaves are cut, place them on a baking sheet and leave the tray in the sun for 1-3 days. Now you’ll place the tray of leaves in a 110 degree F oven for only one to two minutes. This step will stop the oxidation process. Now you can remove the leaves from the oven and let them cool completely. Store in an airtight container.
Oolong tea comes from the largest leaves from the tea plant. After cutting, spread the leaves on a baking sheet and leave them in the sun for 30 minutes. After their sunbath, bring the tray inside and allow them to sit out for 6-10 hours. You’ll need to shake or stir the leaves every hour to help the oxidation process. Once the leaves develop a nice, strong aroma, place the tray in a 250 degree F oven for 20 minutes. Once dried, remove from the oven and let the leaves cool. Store in an airtight container.
Handy List of Tea Growing Supplies
- Containers (plan ahead and get a larger container than your tea plant require so they have room to grow)
- Black mesh window screening
- Silicone sealant
- Potting Soil (can also purchase a premixed potting soil containing vermiculite)
- Vermiculite
- Sphagnum peat
- pH test kit for soil