


You want a pollinator garden at home, but you don’t have a large yard. There’s a solution.
All you need are some containers, pollinator friendly plants and a little creativity.
We’ll keep it simple and start with seven steps for creating a pollinator empowered container garden.
7 Steps for Container Garden Success
Step 1: Location Is Critical
Choose a location in your yard or on your balcony that receives at least 6 hours of direct sunlight daily. Once you have the perfect spot in your space, consider the shape of the containers you want to use and get an idea of how many containers your space can hold. Make sure you save enough space to allow you access to take care of your plants.
Step 2: Choose Your Pollinators Wisely
Now take a look at the list of pollinator friendly plants and choose the plants that you want in your garden. Be sure to include plants that have flowers of varying heights, color and blooming times so your garden provides flowers that appeal to many species of pollinators and will provide flowers throughout the season.
Step 3: Pick Out Your Container(s)
Now that you have your list of plants and an idea of the number of containers your garden will hold, it’s time to choose your containers.
Choose a shape that works best in your space and will allow you to group a few of them together. The color and type of container is entirely your choice.
If the nursery sells planters with separate bottoms, pick up an extra planter bottom to use as a water source for the pollinators. You need to put some small stones or pebbles on the bottom to give the pollinators a perch while drinking to prevent drowning.
Step 4: Have Your Supplies Ready
After choosing your containers, you need to get the supplies you need to plant your garden. You need enough soil (choose a soil that doesn’t contain any chemical fertilizers, pesticides or weed control) to fill all of your pots, some small stones or pebbles for the bottom of your pots to provide drainage, fertilizer (avoid chemical fertilizers, an organic compost is best.) and enough mulch to top all off your containers to retain moisture.
Step 5: Don’t Be Afraid To Mix It Up
Now select the amount and type of plants you will be growing in your garden. Again, be sure you are getting a good assortment of heights, colors and blooming times.

Step 6: Get Creative With Your Design
Now that you have your supplies and plants that you need for your garden, it’s time to get designing your garden’s layout. Take your empty containers to the area you chose for your garden and place them in a design that you like, but will also allow you to reach your plants easily for plant maintenance and watering. There are no rules for this step. Let your creativity run free.
More To Discover
- European Bumblebees on the Brink: Climate and Habitat Woes, and Our Race to Save Vital Pollinators And 7 Solutions Being Tried Right Now
- What To Look for When Buying Houseplants That Will Thrive, and What to Avoid
- Creating a Container Cut Flower Garden on Your Balcony
- Get To Know the Bonsai Tree: History and Art Form
Step 7: Fill Them In
After choosing your garden’s layout, it’s time to start filling your containers with the plants you chose. Place a layer of stone on the bottom of the container to allow drainage, fill the pot 3/4 full of soil, place the amount of plants for the container’s size, add soil to cover and then apply a layer of mulch to retain moisture. Follow the care instructions for the plants you have chosen.
Take the planter bottom you got as a water source for your garden guests and place it in a location within the garden, put a layer of stone on the bottom and fill. Now let those plants start growing and attracting those pollinators. Be sure to deadhead your flowers frequently to encourage more blooms, and don’t use any pesticides or herbicides.
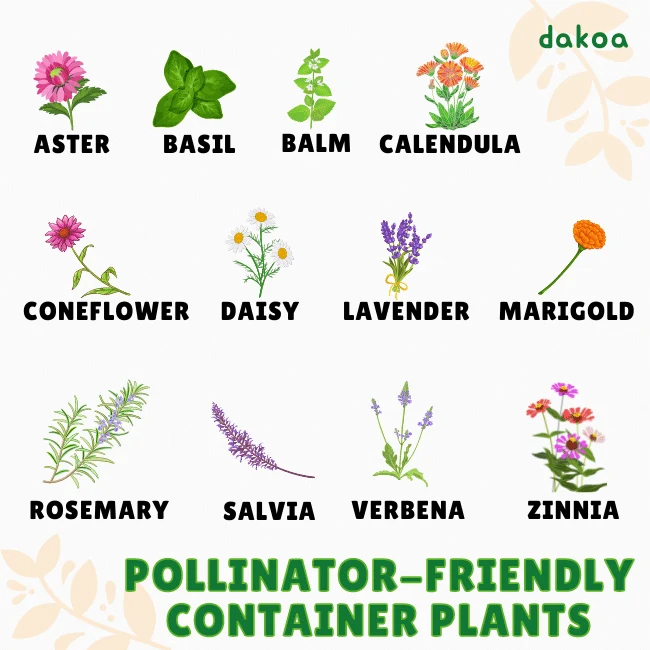
Quick List of Pollinator Friendly Plants For Your Container Garden
- Aster
- Bachelor's Buttons
- Basil
- Bee Balm
- Borage
- Calendula
- Coneflower
- Dahlia
- Daisy
- Lavender
- Marigold
- Nasturtium
- Rosemary
- Salvia
- Snap Dragon
- Verbena
- Zinnia