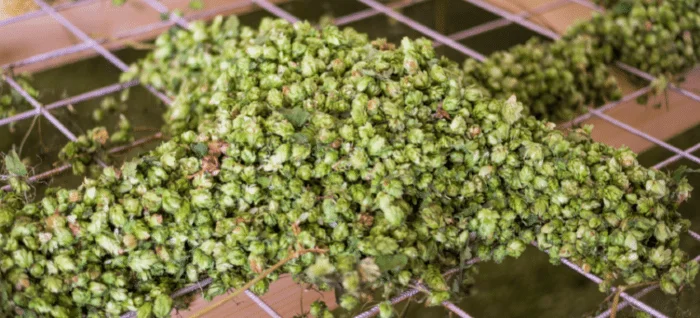
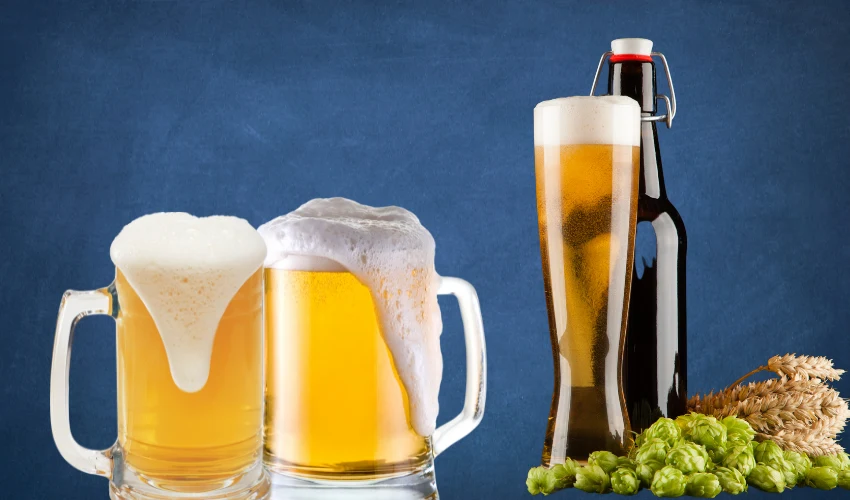
Brew Better Tasting Beer by Growing Your Own Distinct Hops In Containers and Beat Big Brands as Your Own Supply Chain

Olivia Salvatore
By Olivia Salvatore

Attention Microbrewers: Become Your Own Supplier And Grow Hops In Containers In Your Backyard

Microbrewing has become a popular hobby, and so has container gardening. Imagine what you can accomplish by combining the two!

While growing hops in containers can be challenging (at first), the rewards are worth the time and effort. Growing your own hops gives you the opportunity to experiment with a variety and create your own special home brews.

As any successful boutique brewmaster will tell you – the unique flavor is found in your hops combinations. I’ve included a list of the most popular (and widely available) hops varieties for home brewers below.

Keep in mind, the selection of hop varieties does vary and some are offered in limited quantities. Check online for hop rhizome suppliers to find the variety or varieties you’re looking for, and don’t hesitate to source from multiple suppliers.

The more, the better, as you want variety.

Getting Started

The first thing you will need to do is check your yard for the space you want to use to grow your hops, there are a few things to keep in mind when doing this, sun exposure, easy access to water supply, good drainage and vertical space (hop vines can reach heights of over 20 feet). 

Hops should be grown in full sun or partial shade, but if you live in an area that has very high temperatures like the southwestern states, you can keep your hops in the morning sun, but you should move them to a shady area when the sun is strong. 

Also, if the winds are strong, be sure to provide your hop vines with some shelter, high winds will cause the hops to dehydrate, which will result in fewer flower cones being produced.

The next thing you will need to do is choose the type or types of hops you want to grow, use the list below to help you. Different varieties are needed to create certain beer flavors, there are three categories to keep in mind, bittering, aromatic and dual purpose.

Select one variety or select one from each category, depending on your brewing preferences. Hop rhizomes need to be planted in early spring, so keep this in mind when you are planning your garden, suppliers may not have rhizomes available until that time.

1. Bittering Hops

High in alpha acids, low in essential oils, these varieties provide the bitters to your brews. This type of hop is found more in the European hop varieties.

2. Aromatic Hops

Contain higher levels of essential oils than the bittering varieties. These will give the flavors of fruit, honey, flowers, spices and earth to your brews. This type of hop is found more in North American hop varieties.

3. Dual Purpose Hops

These varieties provide bittering or flavor/aroma, depending on when they are added when brewing.

Now that you’ve selected your growing space and what type(s) of hops you want to grow, it’s time to get your supplies together.

I have a handy list of supplies at the end of this article for your reference. Most can be found at any gardening center, or purchased online.

You will need containers that are at least 20 inches deep, as hops vines develop a large root system. 

Try to get the deepest containers your space will allow. 

Keep in mind, you should only plant one rhizome in each container, so that will give you an idea of how many containers you will need. You can also use any sturdy plastic containers or even plastic storage containers.

There are a few things you will need to do to get the container ready to use.

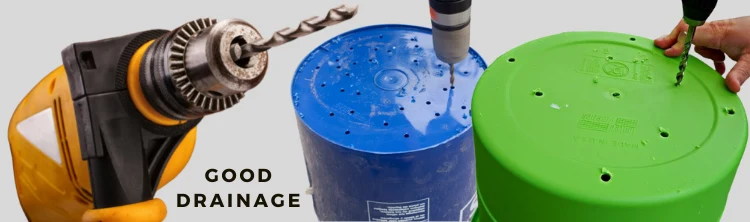
Use a drill with a 1/4 inch drill bit and make a few extra holes on the bottom of the container to ensure proper drainage.

Just how many holes you'll need will depend on the size of the container.

Just keep in mind that while good drainage is important, be careful not to compromise the strength and stability of the container by drilling too many holes.

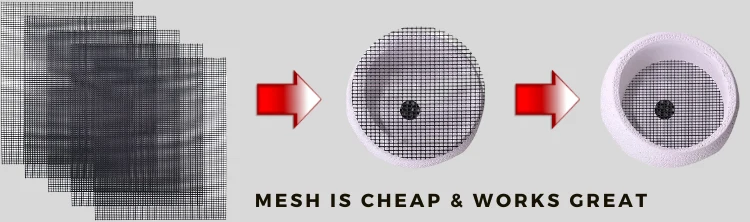
Cut a piece of plastic mesh or plastic window screening to fit into the bottom of the container, this will keep the soil in and let excess water out.

It does help to place a few drops of silicone sealant around the bottom inside edge before placing the screening in and allow it to dry, this will help hold the screening in place when filling the container.

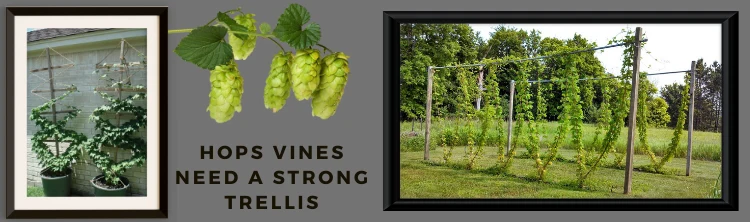
Build a trellis for each container using 2- 8 foot long wooden or bamboo stakes, screw an eye screw into the top end of each stake, place one stake into the soil on each side of the container and make sure it is held securely by the soil, tie one end of twine into the screw eye and wind the twine around the stakes to create a crisscross pattern until you reach the top of the soil.

Be sure stakes are in the container before planting the rhizome to reduce the risk of damaging the rhizome.   

Now you can take your empty containers and supplies out to your garden space and place the containers according to your design.

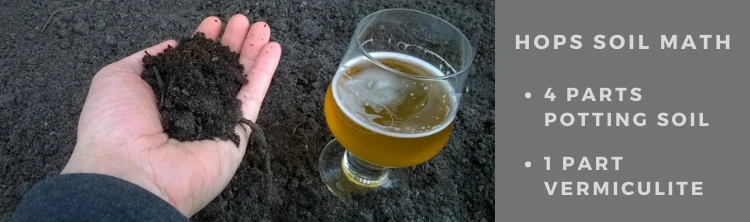
Fill each container with a mixture of 4 parts potting soil and 1 part vermiculite, or you can buy a pre-mixed potting mix from any garden soil, either will work just fine, but if you are filling a lot of containers, it may be cheaper to mix your own.

Fill the container to the top and place one rhizome into the hole and cover with soil.

Water each container so that the soil is damp about 4 inches to allow the soil to settle, once watered be sure to add more soil if the soil settles too much.

Be sure to keep the soil moist until you see sprouts. Keep the best 2 or 3 sprouts and trim the other back to the soil line.

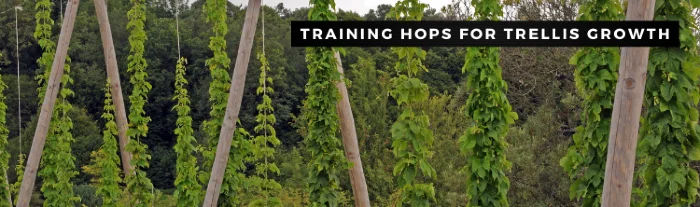
Once the sprouts reach the first line of twine on your trellis, you will need to start training your hop vines to use it, you do this by gently wrapping each vine around the twine, check the vines often as they grow and continue to gently wrap them onto the trellis until they start to climb on their own.

Caring For Your Hops

Hops develop a very large root system and in order to grow and produce well it’s important to water your hops so that water reaches the entire system, to do this, during watering, add water to the container until you see water draining from the drainage holes at the bottom of the container. 

Allow the soil to dry out between watering, but don’t allow it to completely, hops don’t like to be dry. 

To know if it’s time to water your hops, take a look at the soil, if the soil is dark in color it’s still good but if the soil becomes gray in color it’s dry and needs water. 

Also, it’s important to never let the soil dry to the point that the leaves start to wilt. If the temperatures reach 100 degrees F on a daily basis, it’s best to water daily. Soaking the soil this way when watering ensures the entire root system receives water.

To feed your hops, you can use a liquid or powdered plant fertilizer that is available at gardening centers. 

Since the root system is compacted, the fertilizer should be used at 1/4 strength, never full strength to prevent the roots from being burned. 

To apply the fertilizer, use the same soaking method that is used for watering your hops, this will ensure fertilizer reaches the entire root system. 

Hops don’t require frequent feedings, over fertilizing will increase growth beyond what the root system can support.

When your hop vines are healthy, the leaves will be dark green in color and will grow steadily for the entire growing season, if the leaves start to turn yellow or purple and growth slows down you need to fertilize.

You will need to do regular pruning of the hop vines throughout the season to keep the vines healthy, when your vines have attached securely to the trellis, you will need to remove the foliage from the bottom 2–3 feet from the soil, this will increase airflow around the vines and also help protect them from disease and insects. 

You will also want to remove any new sprouts that pop up throughout the season, this will help keep the vines from becoming too tangled and decrease airflow to the rest of the vines. Once the growing season is over, cut the vines down to 2–3 feet above the soil line, they will start growing again in the spring. 

During the winter, you might want to move your containers into the garage or basement, to protect them from extreme cold temperatures, being in containers exposes the root system to freeze damage. Always better to be safe than sorry. 

Harvesting Your Hops

Hops harvest time is usually in August or September, to know when your hops (flower cones) are ready to be picked, gently press one between your fingers, if it feels hard, squishy or damp, it’s not ready yet, when the hop feels light and springy and releases a sticky sap when pressed, your hops are ready.  

The first year’s harvest will be small, but the amount will increase every year.

You can harvest your hops by hand as they mature throughout the season, doing this will help extend your growing season, and you will get more hops. 

For the first season, it’s recommended to let the vines remain intact and pick by hand then allow them to die off, and after they have died off, cut them down 2–3 feet from the soil line, this will allow the root system to absorb any remaining nutrients in the vines to help get them through the winter. 

To harvest any other year, most growers opt to cut the vines down to 2–3 feet above the soil line and pick the hops off, this is the easiest way to harvest due to the height the vines reach. After harvesting, the hops will start to decay right away, so you will need to get them dried to preserve them for later use.

Drying Your Hops

You can air dry your hops using window screens(clean ones) and placing the screens in a well ventilated, dark area for a few days, be sure to turn them over every so often to help the drying process.

You can also dry your hops in the oven by placing them on a baking sheet in a 140 degree F (never hotter) oven and check frequently until they are completely dry. Keep a close eye on your hops to prevent them from burning. 

Once the hops are dried they need to be stored in airtight containers or freezer bags, be sure to remove as much air as possible and place in the freezer until needed. 

It’s a good idea to measure and separate your dried hops according to the recipe or recipes you need them for, and label them with the name of the recipe before placing into the freezer. This will make it easier when it comes time to use them for brewing, your hops are already measured and ready to go.

Now that you have some beautiful, homegrown hops, it’s time to brew. Have fun and enjoy!!

    • Cascade  – Variety most used in American Craft Beers
    • Cashmere – Dual-purpose hop. Has aromas of tropical fruits such as melons, tangerine and coconut.
    • Centenniel – One of the most popular of American craft brewers.
    • Chinook – High Alpha variety. Has a spicy, pine grapefruit aroma.
    • Cluster – The oldest US variety. Strong grower, balanced and light.
    • Columbus – Very high alpha variety. Used for bittering.
    • Comet – Has a strong bittering profile. Has a grapefruit, citrus aroma.
    • Crystal – Delicate, aromatic blend. Has aromas of spices and flowers.
    • Fuggle – Distinct European variety. Has hints of mint, grass and florals,
    • Galena – High alpha variety for home growers.
    • Golding – Provides aroma for English ales.
    • Magnum – Clean bittering variety.
    • Mount Hood – Provides clean bittering and spicy aroma.
    • Nugget – Popular hop for bittering. Has spicy, floral aromas.
    • Perle – Original Germanic bred. Has a soft tea and green fruit aroma.
    • Rakau – Available as alpha aroma. Has tropical fruit, citrus aroma.
    • Sterling – Has a spicy, herbal aroma, with hints of citrus and floral.
    • Tahoma – Has a light lemon, citrus aroma.
    • Willametta – Has a soft flavor with hints of spice.
    • Zeus – Very high alpha variety, hence the god-like name. Used for bittering.

Supplies You'll Need To Grow Hops

Share This Article