Do you scour your seed catalogs or look at all the new varieties that have come out in your gardening magazines?
You can’t wait to go to your local greenhouse and purchase them for your garden or flower bed. But when you get there, you find they don’t carry that variety.
Why not start them yourself? Here’s how!
You Can Do It Yourself!
First, make a list of the plants you’re interested in growing. If you’re a newbie at seed starting, it’s best to choose plants that would be easy to grow.
Starting with finicky plants your first time around can be discouraging if you aren’t successful.
Also keep your list small at first until you get a little experience. You don’t want to overload yourself in the beginning.
Be sure to purchase your seeds early enough in the season so that you can give them a good start.
They may need extra time to sprout and mature enough to be planted. If seed companies haven’t been sending you catalogs, go on the internet and search for seed catalogs or buy online.
Now you need to gather your supplies (see the list I’ve assembled below – it’s short). You can find these online or in any garden center.
You’ll need clean containers, good seed starting mix, fertilizer, warmth, and plenty of light.
Likewise, you can buy special containers, re-use some from plants you have purchased, or some type of container you have around the house.
You can even use empty milk or egg cartons.
Be sure to label each container or tray with the type of seeds you planted, so you will know what seeds are in the container.
Do you happen to have some old seeds from past projects that were never used? See if they are still viable by pre-sprouting.
Dampen paper towels, spread out the seeds, and put the folded towel in a bag. Place in a warm area and check every few days.
If they haven’t sprouted in 10–14 days, you should throw them out.
You can also do this to speed up the germination of new seeds before you plant.
Just handle very carefully when planting, so you don’t damage the root. This is not good to do with very small seeds.
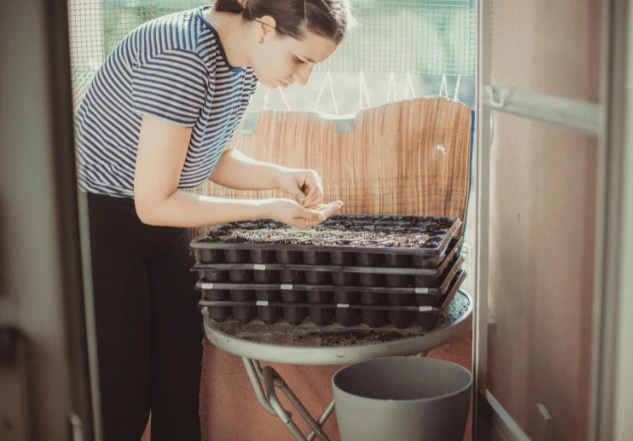
You’re now ready to plant. If you are re-using cell packs or flats, wash first with a mild dish detergent and then dip in a mix of 1 part bleach to 9 parts hot water, let dry.
In cell packs, place 2 seeds in each cell to be sure of getting at least one sprouted seed.
If two sprouts, snip out the weaker of the two with scissors.
Very fine seeds could be spread onto a flat container filled to the brim for good air flow.
If you start your seeds a little too early, your seedlings might get weak and spindly without good lighting.
If you don’t have a really good sunny windowsill, you will need a special grow light to be sure of good growth.
When it is time to put your plants in the ground, you will want to harden them off for a few days to prepare them for the outdoor life.
One way is to hold off on the water a little and also place them outside for just a few hours a day, increasing the time gradually.
In a week, they should be able to handle the outside world without transplant shock.
If you do have a little experience starting your own seeds? Maybe you want to try something a little more challenging. How about tree, shrub, or wildflower seeds?
Generally, these seeds require some time and skills to get them to germinate.
This means, they need to go through some cold and moist temperatures plus warmth to break dormancy. Some will want darkness and some light.
You need to know the specifics of the plant you want to start.
To coax your seeds into germinating, try this method.
Sow seeds in moist seed starter mix in a plastic container with a tight-fitting lid or plastic wrap to hold the moisture and prevent spills.
You don’t need a large amount of mix to get them to sprout.
Place in the refrigerator for one week and then remove to let them warm up for a day or two.
Place in the freezer for one week and then remove to let them warm up again. Alternate this method at least twice before keeping them in a warm environment to allow them to germinate.
For really hard seeds, you can try scratching the surface by rubbing the seed with sandpaper or an emery board.
More To Discover
Learning to start seeds can be fun and rewarding, but it can also be frustrating if you don’t take time to learn the basics before moving on to the harder to start varieties.
With a little dedication and time, you will be a pro in no time. Have fun!
Supplies You'll Need
- Containers (seed starter trays or pots)
- Seed starter mix (no soil)
- Spray bottle with misting setting
- Seeds
- Light fixture and grow bulb (if needed)

