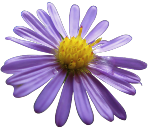
Creating a Cut Flower Garden in Your Backyard

Olivia Salvatore
By Olivia Salvatore

Fresh cut flowers are expensive. In fact, Americans spend nearly $15 billion annually on flowers to drop in a vase.

With just a little space in your backyard, you can save money while still enjoying fresh cut flowers. It takes just a little work and preparation. 

You can grow a garden for fresh cut flowers in your own backyard, no matter what size yard you have.

Follow these steps and your home will be filled with fresh flower arrangements in no time without the hefty price tag.

The 7 Steps Needed To Create A Fresh Cut Flower Garden

Step 1: Choose a location in your yard that receives at least 6 hours of full sun daily and has well-drained soil.

You don’t want to plant in an area that stays wet all the time. If you don’t feel your soil will support healthy plants, consider using raised beds in your garden.

It’s a good idea (and fun) to make a sketch of your gardening location as an outline. This allows you to plan out the garden layout and provides an idea of how many plants you can fit in your space.

When figuring your garden’s layout be sure to place the tallest growing plants in the back and lowest growing ones in front. That way the taller plants won’t overshadow the lower growing plants. 

Always remember to save enough space in your garden that will allow you to care for and harvest your flowers easily. After all, you want to move around your cut flower garden with ease.

Fill each pot halfway with the soil mix and make a hole for the root ball.

Remove your plant from its original container; look carefully at the root system.

If the roots are tightly packed and there’s more root than dirt, you’ll need to loosen them up before planting. 

Place the plant in the new container.

Step 2: Make a list of the flowers you want to grow in your garden.

Be sure to note each plant’s space requirements and whether it is an annual or perennial.

Having that information when you go to the nursery will give you an idea of how many of each plant you can fit in your garden.

If you want to start your plants from seed, you’ll need to start your seeds 6–8 weeks before spring.

You can plant your garden after all dangers of frost are gone in your region.

Step 3: You need to prep the soil in your garden to get it ready for your plants.

Your cut flower crop is only as good as the soil you plant them in. To maximize results, you’ll need to remove any grass and roots from your space.

Loosen the soil by digging down up to at least 12-inches for annuals and 18-inches for perennials and break up any clumps. 

After your soil is loosened up, apply a layer of compost and/or fertilizer and mix it into the soil thoroughly.

Step 4: Now it's time to head to the nursery and stock up on supplies.

You will need to get enough slow release flower fertilizer and mulch to apply to your garden area.

When you’re choosing your plants, ensure that each type of plant has a care instruction tag with it. Pay attention to that tag!

Every plant has specific care requirements.

Take your layout and notes from Step 1 with you to the nursery.

Step 5: Apply the slow release fertilizer to the soil and mix it well.

Before you start planting, you’ll want to apply the slow release fertilizer to the soil. Pouring it straight from the bag to the top of your garden bed won’t get the job done.

You must mix it so that the fertilizer goes about 2 inches into the soil.

You’ll also want to group plants with the same care requirements together to make caring for them easier.

Now that you have your plants in place, water them carefully and thoroughly. This helps remove any air pockets in the soil and gives the plants a much-needed drink.

Place a 2-3 inch thick layer of mulch around each plant to help retain moisture and control weeds.

Step 6: Check in your garden often, using the care instruction tags as your guide.

You will need to do regular maintenance on your garden to keep your plants blooming at their best, this is where the care instruction tags come in handy.

Be sure that you water regularly. Plants that don’t get enough water will become stressed, and your yield will suffer as a result.

It’s recommended to apply a liquid fertilizer to the soil every couple of weeks to keep your plants well nourished during the blooming season.

Dead Head Removal

Removing dead blooms (dead head removal in green thumb) is necessary for the overall prosperity of your flowers. 

Cut off any dead blooms and harvest healthy, beautiful ones frequently to encourage more blooms to grow.

When your annuals have stopped producing for the season, you will want to remove them.

You can use the space to plant a later blooming plant, such as Zinnias, and enjoy a new turn of fragrant blooms later in the year.

Just be sure that you refresh the soil a little by loosing it up and adding more slow release fertilizer.

Step 7: Time to take your blooms from garden to vase safely.

Now that your plants are producing blooms, and you need to start harvesting some to arrange, you’ll need a bucket of tepid water and sharp pruning shears.

It’s best to cut your flowers early in the morning or evening to avoid the heat of the day.

When you cut a bloom, cut it on a slant and remove any leaves that will be below the water in your vase.

Always place the bloom directly into the water.

When you’re making your arrangements, be sure to add a flower preservative to help keep your flowers fresher longer.

Astor

Asters are daisy-like perennials with starry-shaped flower heads that range in color from white to blue to purple.
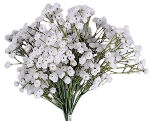
Baby's Breath

Baby's breath may be annual or perennial, and grow in rose, pink and white with single or double blooms.
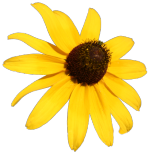
Black Eyed Susan's

A popular backyard favorite that produce golden yellow flowers with a black center, similar to a daisy.

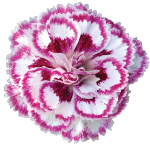
Carnations / Dianthus

Grown abundantly for cut flowers, carnations come in a wide array of colors and sizes.
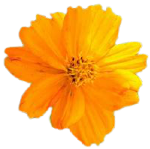
Cosmos

Cosmos are annual flowers with colorful, daisy-like flowers that sit atop long, slender stems. Available in 12 types with a multitude of color options.
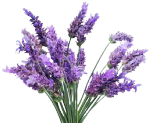
Lavender

Lavender is a bushy, strong-scented perennial plant from the Mediterranean available in purples and blues.
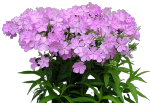
Phlox

Flowers may be pale blue, violet, pink, bright red, or white. There are 67 species of Phlox.
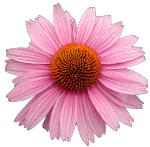
Purple Coneflower

This perennial is the popular of the coneflowers with shades of purples and pinks and are widely planted throughout North America.
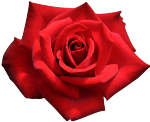
Roses

The popular woody perennial flowering plant is available in over 300 species with dozens of color combinations.
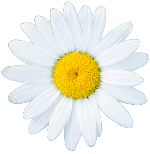
Shasta Daisies

These daisies tend to grow in clumps with all-white daisy petals, yellow disk florets, and contrasting glossy, dark green leaves.
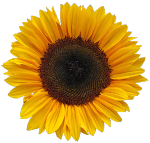
Sunflower

An annual herb with a rough hairy stem 3 to 15 feet high and broad, coarsely toothed, rough leaves up to 12 inches long arranged in spirals.
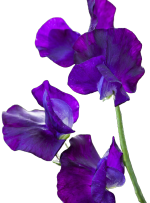
Sweet Pea

An annual flower that is at home in a cutting garden, border garden, woodland, or twining on a trellis or an arch. Popularly used throughout cottage gardens and found in red, pink, blue, white, and lavender.
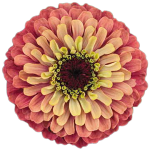
Zinnia

One of the easiest flowers to grow, as they grow quickly and bloom heavily. Zinnia flowers can be found in a wide array of colors.

Share This Article