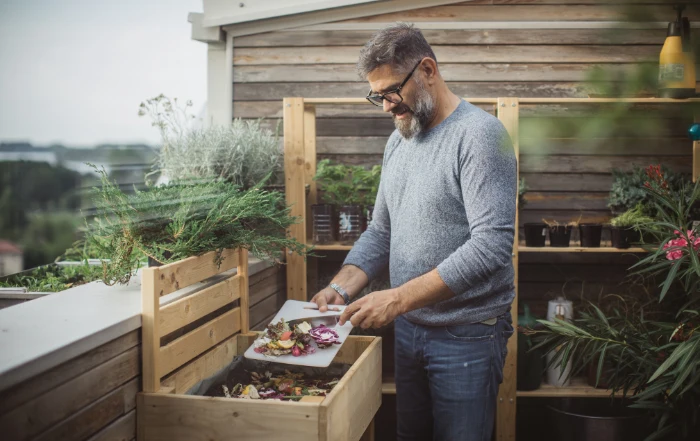
Let’s begin with one of the most common reasons people don’t compost… space.
You want to do your part, but you live in an apartment. That’s not a problem, and it certainly shouldn’t stop you from living a greener life.
Compost bins come in many sizes, and you can find the one that will work best for the space that you have available.
Composting is easy, the bacteria and fungi do most of the work for you. You then are rewarded with a nutrient dense, natural fertilizer for your houseplants and container gardens (yes, even in your apartment).
I’m going to go over the benefits of composting for both the environment and yourself. In fact, I included several helpful lists below.
I hope you’ll use this guide to take that all important step towards a greener lifestyle.
Setting Up Your Composting Bin
The first thing you need to do is figure out how big of a container you’ll need. Essentially, this is going to depend on the amount of composting materials you acquire regularly and the space that you have available on your patio or balcony.
If you live alone, you can choose a smaller container. If you have a full house, you’ll want a larger bin.
You can make your own compost bin, or you can purchase one.
You’ill need a 5 gallon bucket with a secure lid or an 12-18 gallon storage container with a secure lid. It’s important that the container is either colored or opaque. Feel free to get a larger container if you acquire a lot of compostable materials.
Also, keep the bin out of direct sunlight.
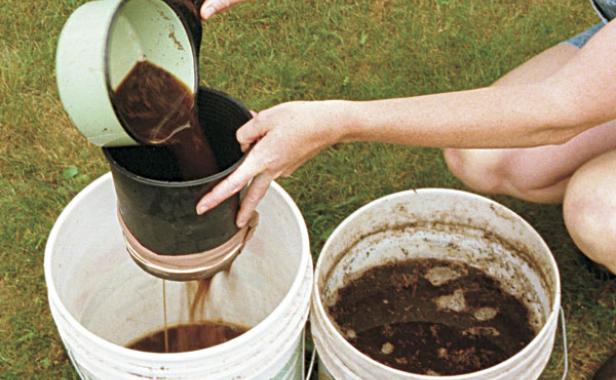
The bin will have airholes on the bottom. You’ll want to either use two containers (most buckets and containers will stack inside each other) allowing the bottom container to catch the liquid that drains from the bin. Or you can place a plastic tray under it.
Absolutely save this liquid!
That liquid that most people throw away is an excellent fertilizer. In fact, it’s so rich in nutrients that it has a name – compost tea. Dilute it with water before using on your houseplants or container gardens.
1. Setting Up Your First Container
To prepare your container, drill holes (use a 1/2 inch drill bit) about 1-2 inches apart, on the lid, the bottom as well as the sides (about 2 inches from the top).
These holes provide the necessary ventilation for the bin. I suggest covering the airholes with black plastic window screening using a waterproof sealant (like aquarium sealant). This little compost hack keeps the airholes from getting clogged while still allowing moisture to drain out.
Let the sealant dry completely before continuing to set up your bin.
You can take this time to gather your compostable items and prepare them (cut or chop all items into small pieces)
Also gather some twigs from around the complex. You’ll need enough to make a layer that is about 2 inches deep.
A list of compostable materials is provided below.
2. Create the protection layer.
After the sealant has dried completely, place a layer of twigs (about 2 inches deep) on the bottom.
This layer provides space for any excess moisture to drain away from the compost and keeps the bin from molding.
3. Adding your compost materials.
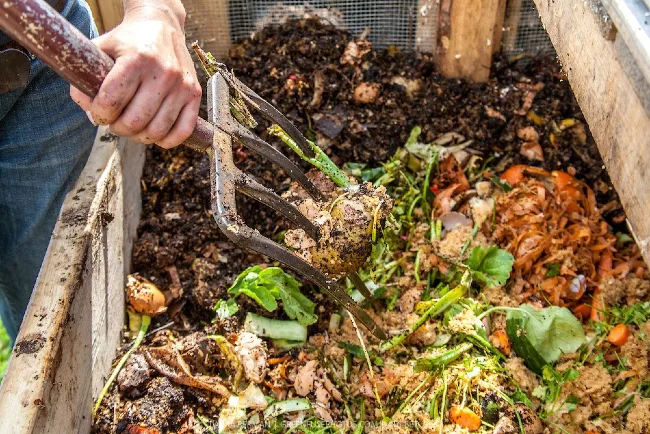
Now you can start adding your compost materials.
Compost materials are divided into two types; brown and green.
Brown materials are wood-based or fibrous. These items are carbon based and provide a source of energy for the microorganisms in the bin, whereas green materials are nitrogen based items.
Green materials include vegetables and fruits. These items provide a source of amino acids and proteins that are needed by the bacteria and fungi in the bin. It’s important to keep the ratio of brown and green materials correct for the composting process to work properly.
The optimum ratio is 2/3 brown materials and 1/3 green materials.
Be sure to cut or chop all the compost materials into small pieces. The smaller the materials you add to your compost bin, the faster they’ll break down into helpful compost.
4. Layering compost like a pro!
Place a 3-inch layer of brown material followed by a 1-inch layer of green material. Repeat the process until your bin is about 1/2 full.
Now you need to moisten those layers with a water bottle on the mist setting. Mist until it’s like a damp sponge. We’re not out to drench it, or you’ll end up with mold.
The last layer (top layer) should be a brown layer. After all, you never want to leave food waste exposed (this will attract pests and cause odor).
Moisten these layers, place the lid on and let the composting begin. Check your bin frequently to be sure that the moisture level is correct. If it appears dry, mist it and if it appears wet, add more brown materials.
Anytime you add green materials (food waste), be sure to dig a hole or trench, then place the items in and cover them completely.
Add some brown materials as well, followed by a light misting.
After about 2 weeks, give your bin a good shake (or roll it a couple of times if it’s heavy). This mixes the compost and aerates it, which helps speed up the composting process.
Do this every 2-4 weeks. If your bin is functioning well, and you keep the food waste covered, your bin won’t smell.
5. Compost takes time.
The composting process takes about 3 months. It can’t be rushed.
The compost will look like a rich, dark soil and have an earthy smell when it’s ready to be harvested.
When harvesting your compost, be sure to leave your bin 1/3 full to keep the process going, otherwise you will have to wait for the process to begin all over again.
More To Discover
If you end up with more compost than you can use, share it with your friends and family, so they may start their own bins. The more people that start composting the better, the earth will appreciate it.
Of course, you can always turn your excess compost into a lucrative and fun side hustle.
List of Compostable Materials
Brown Materials
-
- Shredded Newspaper (no ads)
- Office or School Paper
- Corrugated Cardboard (not glossy coated)
- Paper Towel, Wrapping Paper and Toilet Paper Rolls
- Tree Bark, Fall Leaves, Pine Cones, Twigs and Small Branches
- Straw
- Pine Needles
- Used Coffee Filters
- Pressed Paper Egg Cartons
- Sawdust (from untreated wood only)
- Brown Paper Lunch or Shopping Bags
- Wood Chips
- Tissues and Paper Towels (should not have oils or chemicals on them)
Green Materials
-
- Fruits and Vegetables
- Citrus and Melon Rinds
- Coffee Grounds
- Tea Leaves and Paper Tea Bags
- Houseplant Trimmings
- Weeds that have not gone to seed
- Grass Clippings
- Deadheaded Flowers
- Dead Plants (be sure they are not diseased)
- Seaweed
- Cooked Plain Rice
- Cooked Plain Pasta
- Old Dry Pasta
- Stale Bread
- Corn Husks
- Sod
- Garden Trimmings
- Eggshells (rinse clean first)
- Old Spices and Herbs
- Manures from Rabbits, Goats and Guinea Pigs
List of Things Not to Add to Compost Bin
-
- Raspberry or Blackberry Brambles
- Long Twigs or Large Branches
- Pet Droppings (Cat or Dog)
- Animal Products (meat, bones, fat, fish or dairy products)
- Coal Ash
- Colored or Shiny Paper
- Any Chemicals (herbicides, pesticides, fungicides)
- Diseased Plants
- Weeds that have gone to seed
- Plastics
- Pressure Treated Woods
The Many Benefits of Composting
For The Home
- Helps retain moisture in your lawn
- Promotes healthy plant growth
- Promotes healthy lawns and landscapes
- Eliminates the usage of chemical fertilizers
- Saves water (helps soil retain water)
- Reduces your carbon footprint
- Reduces greenhouse gases by keeping food wastes out of landfills
- Reduces the amount of trash
For The Environment
- Helps soil retain and absorb water
- Improves soil health
- Helps reduce the number of contaminants that reach ground water by acting as a filter for rainwater
- Helps control erosion
- Helps reduce greenhouse gases
- Helps storm water management
- Promotes healthy plant growth
- Helps combat climate change
- Reduces amount of trash in landfills


