


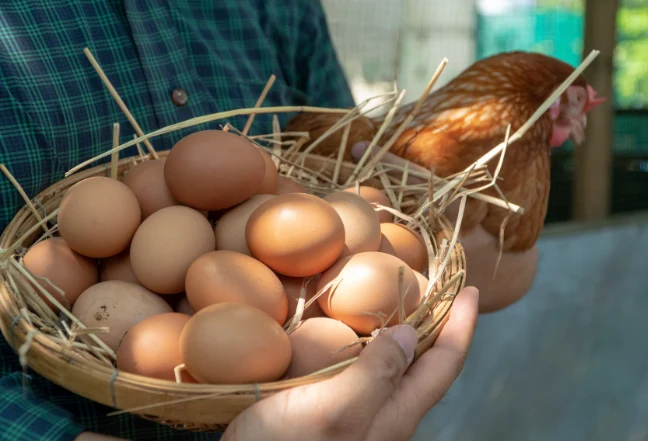

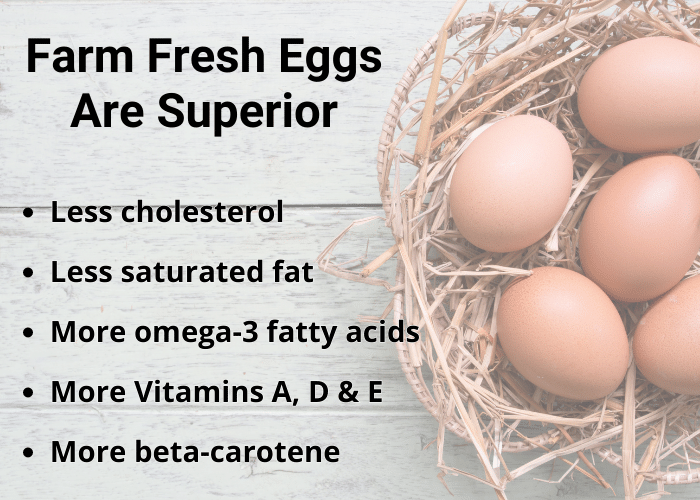
You’ve undoubtedly heard about the benefits of farm fresh eggs. Inexpensive, instantly available, and naturally higher in omega-3 fatty acids thanks to their natural grass diet.
Keeping chickens in your backyard may sound like a great idea initially. Certainly, Facebook and Pinterest make it look appealing and relatively easy.
Let’s cut through the carefully staged marketing photos of smiling backyard chicken keepers and get to the source.
This page is your how-to guide of keeping chickens to ensure farm fresh eggs year round.
Check Your Local Laws & Regulations
The first thing you need to do before getting chickens is to check the rules and regulations concerning owning chickens/livestock in your area.
If you have an active Homeowner’s Association (HOA), you’ll need to check with them concerning any livestock limitations.
The last thing you want is to get everything set up and then find out you’re not allowed to keep chickens.
While you’re finding out the overall viability of having some chickens in your backyard, consider the overall cost and associated time and work that will be included.
The initial costs could be high. And properly caring for chickens requires daily chores, even in bad weather, as well as feed and supply costs (although not extremely high, they will be an ongoing expenditure).
Now it’s time to look over your yard and get an idea of how much space you have available. You’ll want to provide as large of a coop and exercise pen you can.
Measure the length and width of the area in your backyard you’re willing to hand over to your new flock. You’ll need that information when you get the coop and exercise pen.
It’s always a good idea in life to plan ahead! Consider getting a coop that’s capable of housing more chickens than you plan on keeping. After all, it’s likely you’ll want to add more down the road.
You will need to have the coop and exercise pen set up and ready before bringing any chicks home. They do grow quickly, and you want everything set up, safe and secure right away. Being fully prepared will be less stressful on you and on your new chicks.
The Coop & Exercise Pen
The coop/exercise pen size will depend on how much space you have available in your yard.
Using the measurements (length and width of the chosen space) you can figure out how many chickens you can keep.
On average, most new chicken keepers start with three to six hens. Unless you have an unusually large family, that’s all you’ll need.
Coop to Hen Ratio
The coop should provide at least three square feet of space for each hen.
The exercise pen should provide 8-10 square feet of space for each hen.
Based on those numbers, if you start with five hens, you’ll need at least a 15 square foot coop and a 40 square foot exercise pen.
You can either build a coop/exercise pen yourself (plans and how-to videos are all over YouTube), or you can purchase a coop from a farm supply store or online.
Be sure that both the coop and pen are large enough for you to get into easily for cleaning and maintenance.
Coop Care and Best Practices
It’s recommended to attach hardware cloth on the inside of any windows and vents using screws and washers, to prevent predators from being able to enter the coop.
This will allow windows to remain open throughout the day for ventilation. You can use inexpensive linoleum to help protect the coop floor from moisture. Many home improvement stores sell rolls of returned linoleum at a discount.
Be sure to secure any window latches and doors with bolt locks to prevent predators from getting into the coop. Keep in mind that raccoons can figure out simple locks very quickly.
Cover any openings larger than 1/4 inch with some hardware cloth.
Roosting Bars
You will need to provide roosting bars for your hens, each hen should have about 10 inches of roosting space. Using an untreated 2×4 with the 4-inch side facing upwards make the best roosts for your hens, as they allow the hen to lay with her chest on her feet, which is the most comfortable and safest way for her to roost.
It’s recommended to use a flat-bottomed U-type bracket that supports the width of the bar. Brace the sides of the bar, so you can lift the bars out to be cleaned, but will still hold the bars securely.
Be sure to sand the boards smooth (no splinters) and round the edges, this will protect her feet from injury.
The roosting bars should be 1.5 -2 feet off the ground and if you are using a ladder type design for the roosts, be sure that the bars spaced 15–18 inches apart to prevent the hens on the lower roosts from being pooped on.
Also, if you are providing roosting bars over 3 feet off the ground, place a ladder or ramp along one side to allow the hens to get up and down easily to prevent injury. It’s highly recommended to install removable dropping boards (cover with linoleum) under the roosting bars to make morning cleaning easier.
Remove the dropping boards, scrape off droppings (into a bucket lined with bag) using a drywall taping knife, wipe clean with a solution of 1/2 white vinegar and 1/2 water or use a bleach solution(1 cup of unscented bleach to 1 gallon of water) and place boards back in place. This really will save time.
Nest Boxes
Your hens will need nest boxes to lay their eggs in, you can purchase nest boxes, build some, or use clean, covered cat litter boxes or baskets.
The standard size of a nest box is 12 in x 12 in.
What you decide to use is your choice, just be sure they are easily cleaned and provide a little privacy for your hens. Use a nest box pad on the bottom of the nest box to cushion the egg when it drops from the hen.
These are available at farm supply stores and online.
The recommended number is 1 box for every 3 hens. The nest boxes should be cleaned as part of the morning chores, keeping the nest boxes clean will mean cleaner eggs.
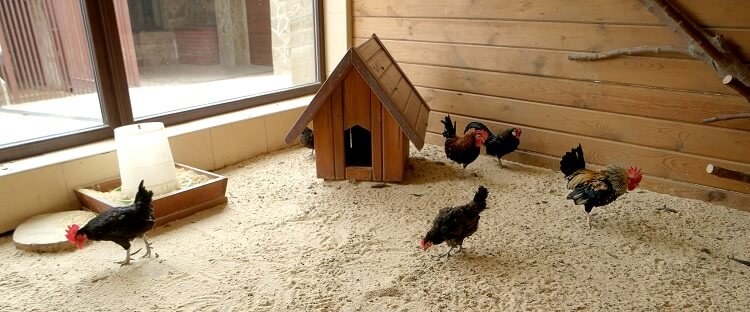
You Can Get Creative
Just Give Your Ladies Enough Space
Coop Bedding
There are a few options for coop bedding; straw, pine shavings or sand. Look into all the options and decide what will work best for you.
The one you decide to use is your choice, but sand is considered the best coop/exercise pen bedding for chickens, so that is what will be discussed here.
The type of sand that you will want to use is considered washed construction grade sand, this sand is natural and contains a variety of grain sizes.
You can buy it in bulk from construction supply companies, or at landscaping, home improvement companies.
Be sure to never use play sand, silica sand or crushed granite.
The benefits sand has as a bedding are, inexpensive, keeps coop/pen drier, insulates from both heat and cold (prevents frostbite), keeps moisture levels down, provides grit for your hens’ digestion, makes daily cleaning easier by removing moisture from droppings and makes them easier to remove (with a cat litter scoop or sifter), provides hens with a dust bath and keeps hens feet clean which means cleaner eggs in the nest box.
Using a long handled sifter or a cat litter scoop, remove any droppings at least once a day from both the coop and exercise pen. Keeping your chicken area clean and dry is very important for the health of your hens. The droppings can either be composted or disposed of.
Sand should be removed and replaced once a year.
Enhancing The Coop
You can always add a few enhancements to your coop!
The most popular are…
-
- Electricity (for lights, fans and automatic door)
- Automatic coop door (can be set to open and close at certain time)
- Motion detector near coop and pen (to alert you to possible predators)
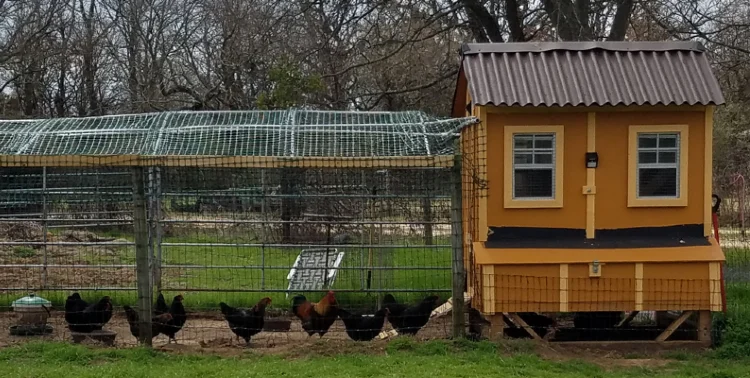
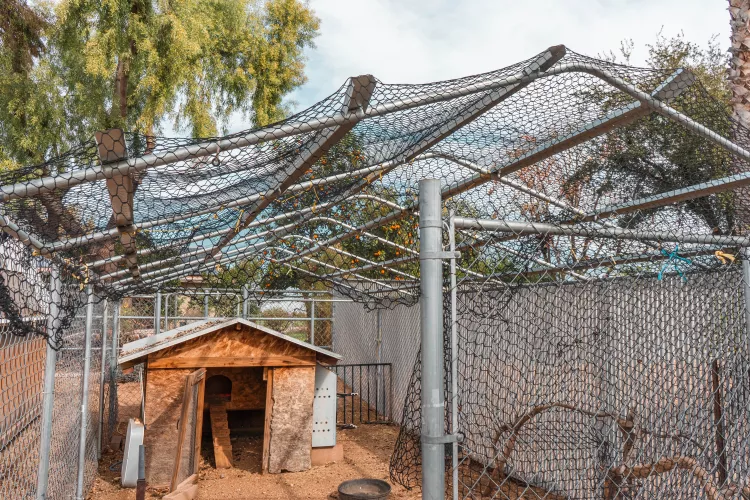
Predator Threats & Protection
It’s best to place a roof on your exercise pen to provide shade, protection from aerial predators and shelter from rain and snow for your hens.
A roof will help keep your pen drier, which is important for your hens’ health.
Dig a 6-inch trench around the outside perimeter and 6-inches inside the perimeter (total 1 foot trench and pen fencing will run down the center) of the pen and place hardware cloth in the trench and cover with dirt, this is to prevent predators from digging under the pen to get to your hens.
Be sure to use carabiners on any gate/door latches to provide an extra barrier for clever predators like raccoons (they are really good at figuring out latches).
Be sure to check the entire pen inside and out for any openings (snakes and small predators can fit through very small openings) and cover them with hardware cloth. You can’t be too careful when securing your chicken’s living area – threats are everywhere from wild predators as well as domestic ones (stray cats and dogs), so any extra steps are beneficial.
Hardware cloth is a sturdier choice than chicken wire when protecting from predators. Losing your flock to a predator is hard, so make sure their coop and pen are well secured.
As a bedding for the exercise run, sand is the best choice, it will keep your pen drier, make it easier to clean, be a source of grit for your hens’ digestion, stay cooler in the summer and prevent frostbite in the winter.
The sand should be 10 inches deep and if it becomes wet be sure to turn it over with a shovel (a rototiller works great for this) to help it dry and not clump. It’s recommended to get a long-handled sifter for cleaning the pen, but if you don’t mind-bending or crouching, you can use a cat litter scoop.
The sand will fall out and the poop to remain and be disposed of. If you have a compost bin, chicken poop is a great fertilizer, if not be sure to dispose of it responsibly. A Doggie Dooly Digester works great as a disposal system for your chicken droppings, there are even instructions online on how to create one yourself.

You will want to keep your hens food and water container out in the pen, this encourages your hens to spend time outdoors and stay active. The most popular food and water container are the gravity style poultry feeders and water container that has nipple drinkers or cups on them, these will hold a good amount of feed and water, keep the hens from standing in them and help keep debris from building up.
It’s recommended to place some patio pavers under your containers to keep them from being on the ground, which will allow more bedding and other debris to get into the feed and water.
Be sure to place them more towards the center of the pen to keep them from being exposed to rain or snow and sun, which would cause the feed to get wet and encourage mold growth and sunlight will encourage algae growth in your water container. If your pen doesn’t have a roof, place them under some sort of shelter to protect them from weather exposure.
Even though the gravity feeders can hold a couple of days of food, you should still check the feed daily to be sure it is still dry and clean, and the waterer should be cleaned and filled daily, clean food and water is very important to keep your hens healthy.
There are other options on the market, and you can choose the type of feeder and waterer you feel most comfortable with, these types are popular just to make keeping the food and water supply as clean as possible.
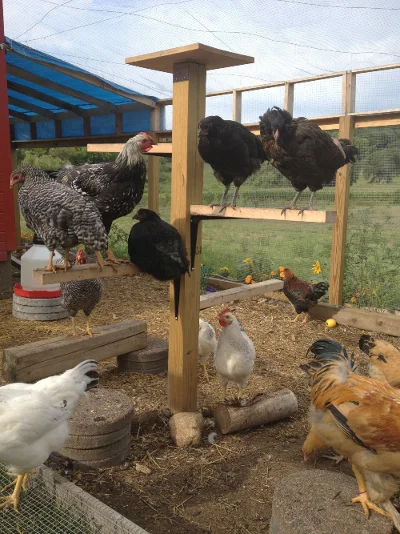
You will want to provide some roosting bars for your hens to perch on, the design of the outdoor perches is up to you, you can keep it simple or be creative, make a stand and place one long bar, or you can make an A- frame style will multiple bars, your hens will just appreciate a place to rest off the ground.
Tree stumps and tree branches (be sure that they are braced and stable to prevent them from tipping over on your hens), chicken swings (you can purchase these in farm supply stores or make your own, there are instructions online) and some toys (whiffle balls, old children’s xylophones and a mirror hung in the run) will all be appreciated by your hens and keep them active which is important for their health.
You can allow your hens some free-range time in your yard to nibble some grass and bugs, but only do this when you are able to supervise them, it’s best not to leave them unattended at any time to ensure they are not in danger of predators or escape.
Be sure, if you intend to allow your hens into your backyard, you don’t use any pesticides or any other harmful chemicals, these could harm or kill your hens.
Feeding Your Flock
First and foremost, you need to use a high quality, nutritionally complete chicken feed.
The food your hens eat is not only important for their health, but it’s also important to provide your hens with the nutrition they need to make good, strong eggs.
If your hen is eating a poor diet, she will be susceptible to nutritional deficiencies, disease, and decreased egg production and egg quality (weak shells, poor yolks).
So, try to always provide your hens with the best quality you can give them.
Treats can be given, but should be given in limited amounts (no more than 10% of her daily diet) to ensure that she eats primarily the layer feed.
Hens can enjoy…
-
- dark leafy greens, lettuce (no iceberg)
- vegetables
- fruits (very limited amount due to high sugar content)
- cooked beans (not dry or canned)
- sprouted seeds
- dried crickets
- meal worms
- black soldier fly larvae
Always avoid salty, sugary, fatty or canned vegetables and fruits, these will cause problems in the health of your hens. Food and water should be available at all times to your hens. Chickens graze throughout the day, and that’s important for their digestion process. Also, birds have high metabolisms and should never go without food and water.
Here is the recommended schedule for what to feed your chickens for each stage of growth:
Starter Feed- 1 day- 8 weeks- 18-24% Protein starter crumbles
Grower Feed- 8 weeks-18 weeks- 16-18% Protein crumbles/small pellets
Layer Feed- 18 weeks and over- 16-18% Protein Layer Feed
If you come to the point where you will have chickens of different ages, it’s recommended to not feed layer feed to the mixed age flock until the younger birds reach 18 weeks old and can start eating the layer feed.
Instead, feed them the chick/grower feed and place a container of crushed oyster shells (to provide calcium to your laying hens) and when they reach 18 weeks switch them all to the layer feed.
The reason for this is that Layer feed contains higher levels of calcium, which will harm the younger birds. Now, the hens will be fine with the extra protein until the young birds reach 18 weeks of age.
There should always be a container of crushed oyster shells available to your hens. Even though layer feed has calcium in it, they need a source to ingest to keep the eggshells strong.
Grit should also be available to your hens. If you aren’t using sand in your coop or pen, grit is important for your hens’ digestion, as it helps grind up the foods they eat.
The important thing to remember is to always be sure your flock has fresh food and water at all times to keep them in the best condition for laying eggs and staying healthy and happy.
Where To Get Your Chickens
There are a couple of options available when it comes time to get your chicks, you can purchase them from a farm supply store or a poultry breeder/supplier (are available online to be shipped).
Getting your chicks from the farm supply store will be less expensive, but it could pose some problems for you because the chicks are almost always a mixed sex batch, which means unless someone at the store is experienced in sexing chicks, you could end up taking home mostly male chicks and will usually be of one breed type (some people want a mixed flock of layers or have a particular breed they want).
Male chicks are fine for someone interested in raising a meat bird flock, but aren’t going to work for someone that wants laying hens, not to mention a lot of cities, towns and HOAs forbid rooster ownership, so you might want to opt to get your chicks from a poultry breeder/supplier such as, McMurray Hatchery, Meyer Hatchery or Stromberg’s Chickens.
Now, it might cost a little more, but it will save you from having to find a way to rehome male chickens when, after brooding and caring for them for 18 weeks, you find out you have boys.
These companies sell sexed birds (so you will almost always get females when you order from them) they have more breed varieties (find the breed or breeds you like) and they have chicks available all year round.
They likely will have a 6 chick minimum for shipments, which is the preferred small flock number anyway. A few of them will also offer poults (female chicks that are at the age to start laying) for those that don’t wish to go through the brooding process with chicks or are anxious to gather eggs (chickens won’t lay their first egg until they are 18–24 weeks old and sometimes a little older). Again, they will cost you more, but it’s a solution for those that don’t want to go through brooding.
The choice is yours, so go with the one you are most comfortable with.
A list of the best egg laying breeds is provided below. Take a look at the different breeds and find the one or ones that you would like in your flock.
Brooding Chicks
Try to have your chick brooder set up and ready before bringing your chicks home. This reduces stress on everyone involved!
There are several options on brooder set-ups, however, this article is going to focus only on the most popular, if this way isn’t for you, there are several other options available online that will give you instructions on how to set up a brooder you are comfortable with. A list of supplies for this set up is provided below.
Most chicks that you purchase will be 1 or 2 days old and will require a brooder to keep them clean, safe and warm as they grow, which is usually 6–10 weeks, and are fully feathered.
Once they have their adult feathers and the outdoor temperatures stay above 65 degrees F. You will want to keep your brooder in a draft free room and away from other pets. If you can’t keep them in a room where other pets might be, be sure to make a secure cover out of hardware cloth for your brooder.
Each chick needs about two square feet of space in the brooder.
No need to overcomplicate this! Just get a couple large cardboard boxes that are at least 24 inches high (to keep chicks from getting out as they grow), cut a doorway into one side of each box (be sure they line up), leave about an inch high lip at the bottom of the doorway and duct tape the two boxes together securely and cover any cut edges in the doorway with duct tape. Also remove the top flaps from each box.

Place puppy training pads on the bottom of the boxes (this will help keep the box bottoms dry) and place a layer of paper towels over the puppy pads (these can be easily removed when they get soiled).
Keeping your chicks’ brooder clean and dry is very important for the health of your chicks, so be sure to change the paper towels at least once a day, preferably more often. The puppy pads should also be changed when they become soiled, it’s best to over-clean than under-clean your brooder.
You will need to get a chick brooding plate, which will provide a steady temperature for your chicks, there are several brands available online or in farm supply stores. Even though these might be more expensive than using heat lamps, they are safer and keep the heat at a more constant rate than heat lamps, which is worth the extra cost. Place the chick brooding plate at one end of your brooder box.
Keeping the brooder box warm is very important for the chicks until they are 6–7 weeks old. The temperature should be 95 degrees F for the chicks’ first week and can be reduced by 5 degrees each week or until the ambient temperature is the same as the brooder.
The best food dishes for chicks will have several openings (usually 6 or 8)on each side, they are made out of either plastic or metal, these type of feeders help keep the feed cleaner by keeping the chicks from standing in it and pooping. They are light and can be tipped over, so using some double-sided tape on the bottom (onto the puppy pad) will help a bit.
Be sure that the dish always has food in it or, even better, keep a few dishes in the brooder instead of just one, to be sure there is always food available, you never want your chicks to go without food.
Your chicks should eat Starter Crumbles (18-20% protein) until they are 8 weeks old and Starter/Grower feed from 8 to 18 weeks (16-18% protein), after that they will be switched to a layer feed.
You also will need to place a dish of chick grit in the brooder, this is necessary for their digestion. As you place each chick into the brooder, you will need to take each chick to the feeder and place its beak into the feed to show them where the food is. Be sure each chick is eating.
The best waterers are a chick safe gravity waterer (these have a narrow moat which prevents drowning). If you choose to use a shallow dish, put marbles on the bottom to prevent drowning.
As you place each chick into the brooder, take them individually to the waterer and gently place the end of its beak into the water. This guarantees that each chick knows where the water is.
This step is critical!
It’s extremely important to make sure each chick is drinking and that there is always fresh, clean water available to them.
Always be sure to monitor your chicks! You must ensure that they’re eating, drinking, warm, clean and dry. Chicks are very fragile for their first couple of weeks, so being vigilant is important to avoid losing your chicks.
When your chicks have their adult feathers and the outdoor temperature stays above 65 degrees F, you can move your chicks to the coop.
Be sure to take them out to the exercise pen and show them the food and water containers, and do regular checks throughout the day to make sure they are eating and drinking.
Put your chickens into the coop at dusk if they haven’t already found it, and close them inside the coop until morning. This should become a part of your daily chicken keeper chores.
Keeping Your Chickens Healthy
Keeping track of your flocks health is very important, so you need to become familiar with chicken anatomy, diseases and treatments.
A list of the signs of illness as well as a list of common chicken diseases and health problems are provided below, look up the diseases, the symptoms and the treatments, so if you ever come across one or more of your flock showing any of the symptoms, you will know what you need to do to help your birds get through it.
Animals are very good at hiding illnesses (it’s a survival mechanism), so when you do see signs of illness, they’re already very sick! This is why doing a visual check on your flock daily for signs of illness or injury is very important.
You should do a more thorough exam (picking the hen up and checking her head to toe) once a week. Keep an eye on their toenails and beaks to see if they require any trimming (there are how to videos available online), check for any injuries or wounds, swelling, eye, nose or mouth discharge, thinness, parasites or dirty vents (rear end).
Handling your chickens from an early age will get them used to being picked up and examined, this will make these regular exams a lot easier on both of you.
Check your local veterinarian listings and find a vet that is experienced in treating birds and livestock, and keep a couple of numbers on hand in case of any emergencies. A list of first aid supplies you should keep on hand is provided below, keep your kit in a storage container or other waterproof container in an area where it can be found quickly.
You’ll want to have a quarantine cage that is in an area far away from your coop, and it should be big enough that the chicken can move around and hold a food and water dish. You can build a cage using hardware cloth on a wood frame, or you can use a wire dog crate.
The area that the cage is kept must be clean, warm and out of reach of pets and predators. Any time you have a sick chicken, you’ll need a pair of coveralls or even a spare set of clothes nearby to put on over your clothes, so they can be easily removed, to keep the rest of the flock from being exposed when you’re near them.
Also wash your hands and arms before going in the coop with the other birds. Any protective steps you can take will help keep your other birds healthy.
Be sure to thoroughly disinfect the cage and any items that the sick bird was in contact with, as well as the area around the cage before you store it away. Hopefully you won’t need a quarantine cage for a sick bird, but it’s always better to be prepared in case.
What To Do With The Older Hens?
A hen will be her most productive in egg laying for the first 2-3 years, after that age it will decease.
This is the time chicken keepers have some decisions to make. If your coop is large enough, you can start a new flock. If plausible, you may choose to build a new coop or add onto the existing one.
Of course, the alternative many small chicken keepers don’t like to think about, is harvesting an aging hen for meat.
This decision is yours to make and of course are able to make due to space, finances or city regulations. If the decision to harvest your hen is made, be sure to find a reputable processor or someone with experience in processing to do it for you.
The day will come where you must make one of these choices. It’s often best to consider it, weight it carefully and decide in advance.
10 Best Chicken Breeds For Laying
Australorp
Hailing from Australia, this breed consistently produces large brown eggs, making it a favorite among egg enthusiasts and small-scale farmers. Known for its friendly disposition and ease of care, Australorps are a great choice for those seeking reliable egg production and straightforward chicken keeping.
Ameraucana
Ameraucanas are prized for their distinctive blue-green eggs. These friendly birds are known for their unique appearance with fluffy facial feathers and are relatively easy to care for, making them a great choice for backyard egg production.
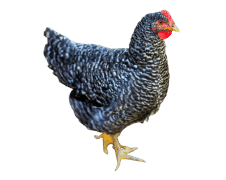
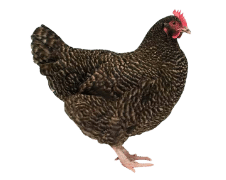
Barred Plymouth Rock
Barred Plymouth Rocks are reliable brown egg layers with distinctive black-and-white striped plumage. They are known for their calm demeanor and adapt well to various environments, making them a popular choice for both egg production and hobby farming.
Delaware
Delawares are excellent dual-purpose birds, valued for both their meat and egg production. They lay brown eggs consistently and have a pleasant disposition, making them suitable for small farms or backyard flocks.
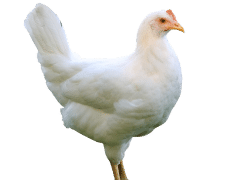
Leghorn
Leghorns are renowned for their remarkable egg-laying abilities, producing large quantities of white eggs. They are active and alert birds that thrive in free-range setups, but they may require a bit more attention due to their high energy levels.
Marans
Marans are prized for their dark chocolate-brown eggs, which stand out in egg baskets. They are calm and friendly birds, suitable for both egg production and exhibition purposes. Their unique eggs and gentle temperament make them a favorite among hobbyists.
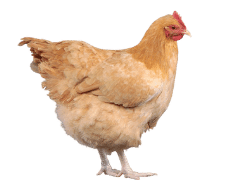
Orpington
Orpingtons are known for their fluffy appearance and gentle personalities. While they might not lay as many eggs as some other breeds, their brown eggs are sizeable, and their easygoing nature makes them a popular choice for backyard flocks.
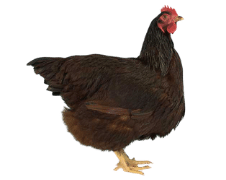
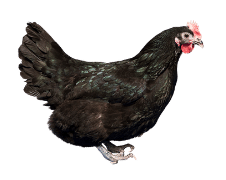
Rhode Island Reds
Rhode Island Reds are classic brown egg layers known for their hardiness and consistent egg production. They are adaptable and thrive in various climates, making them a practical choice for those seeking a reliable source of eggs.

Sussex
Sussex chickens come in various color varieties and are valued for their dual-purpose capabilities. They lay light brown eggs and are known for their docile temperament, making them suitable for both egg and meat production.

Wyandotte
Wyandottes are versatile birds known for their beautiful, laced plumage patterns. They lay brown eggs consistently and are cold-hardy, making them a good choice for colder climates. Their hardy nature and attractive appearance make them popular among backyard enthusiasts.
Most Common Signs of Illness in Chickens
-
- Pale or shrivled comb/wattles
- Discharge from eyes/nostrils or mouth
- Coughing, wheezing or rattling
- Hunched over
- Head tucked back
- Ruffled feathers
- Lethargy/Sleepiness
- Hiding
- Dirty Vent(rear end)
- Loose or discolored droppings
- Not eating or drinking
- Thinness
- Reduced egg production
- Swollen or squishy abdomen
- Swelling in feet, legs or face
List of Common Diseases and Health Issues in Chickens
-
- Fowl Cholera
- Coccidiosis
- New Castle Disease
- Infectious Coryza
- Mushy Chick
- Pasty Butt
- Avian Influenza
- Fowl Pox
- Salmonellosis
- Marek’s Disease
- Pullorum
- Bumble Foot
- Botulisum
- Infectious Bronchitis
- Air Sac Disease
Assembling A First Aid Kit For Chickens
- 325mg Aspirin (not baby or low dose)
- Bird Handfeeding Diet
- Disposable Gloves
- Dog Toenail Clippers
- Chlorhexadine 2% Solution
- Epsom Salt
- Eye Dropped or Syringe
- Neosporin (antibacterial ointment)
- Non-Stick Gauze Pads
- Poultry Vitamins
- Scissors
- Storage Container
- Styptic Powder
- Super Glue
- Towels (old towels of any size)
- Tweezers
- Vetricyn Wound and Skin Care
- Vetwrap
Frequently Asked Questions
No. Hens will lay eggs without you have a rooster or not, the eggs will just not be fertilized and will not hatch.
Straight run chicks are chicks sold as a mixture of approximately 50% pullets (females) and 50% cockerels (males) these chicks will be less expensive, sexed chicks have been separated into pullets and cockerels, and will usually be 90% accurate, sexed chicks will cost more, but for people interested in only keeping hens for eggs, will usually pay the extra charge to be sure they won’t receive any males.