


Just because you live in an apartment doesn’t mean you can’t take a step toward a greener life by having a worm bin.
Worm composting or vermicomposting is a great way to dispose of food scraps and some paper waste that would otherwise end up in landfills.
The benefit of using a worm bin to dispose of these items, is that you will get a nutrient rich compost for your houseplants and container gardens.
Follow these 6 steps and, you will have worm compost to feed your plants and container gardens in no time.
You will need to gather the supplies you will need to make your worm bin. A list of supplies is provided below.
Step 1: Supply Run!
You will need a container for your worm bin, a 10-gallon storage container with a lid is perfect.
Be sure that it is opaque or solid colored and not clear, as worms don’t like light. You will need to drill holes (1/8-inch drill bit) into the sides along the top of the container for air circulation.
You also need to drill holes near each corner at the bottom of the container to allow any excess moisture to drain out of the bin.
Step 2: Worms Need Beds Too
To make the bedding for your worm bin, you will need a lot of paper, but you have options:
-
- Newspaper (no shiny ads)
- Corrugated cardboard
- Computer paper
- Paperboard (toilet paper and paper towel rolls, cereal boxes or soda cases).
Tear the paper into thin strips, or use a paper shredder and rip cardboard into small pieces.
Place the paper into the container and start moistening it until it feels like a damp sponge.
Be sure the paper isn’t dripping wet, if the paper is too wet you can wring it out, or you can add dry paper to absorb the excess water.
Add two or three hand shovels of garden soil (don’t use soil containing any chemicals) into the paper and mix into the paper by fluffing the paper up.
It’s important to not let the paper become packed down, you want it to be loose to provide air.
Step 3: Worm Housewarming Party!
Add the worms by placing them on top of the bedding. Then place a light layer of bedding to lightly cover the worms.
Give the worms 24 hours to get settled into their new home before feeding them.
To feed the worms, make a hole in the bedding and place about two cups of food scraps into the hole.
Cover the food scraps with bedding.
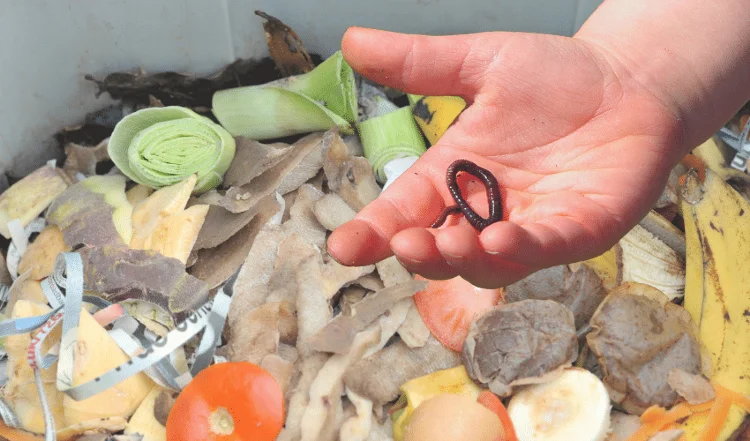
Red Wrigglers are considered the best worms to use in your worm bin. These red beauties are plentiful from a worm farm online.
Do not buy your worms from a bait shop! Bait shop worms will most likely not be the right species.
You’ll need one pound of worms for your 10 gallon container.
Step 4: Finding That Perfect Worm Bin Storage Spot
Your new worm bin must be kept in an area that stays between 50 and 80 degrees F (10-27 degrees C). You can safely keep your worm bin on your balcony, just keep it out of the direct sunlight or extreme temperatures.
Personally, I recommend that you keep the bin indoors most of the year to keep the worms in a more constant temperature.
I keep mine under the kitchen sink, but any closet or pantry will do. Remember, you don’t have to worry about the worms escaping. Just keep your bin away from windows, as direct sunlight will cause the bin to heat up.
Place a shallow plastic tray under the bin to catch any liquid that drains out. No different from what you would do with a houseplant. Some liquid is normal, but you should check to make sure the bin hasn’t become too wet.
If the bin is too wet, add some dry bedding.
Save that nutritious liquid! The liquid from the tray is valuable. It’s a wonderfully nutrient rich treat for your houseplants and container gardens, just be sure to water it down before using it. Think of it like a concentration of goodness.
Step 5: We're All About Those Scraps!
Keep food scraps in a container in the fridge or in freezer bags. Thaw a day before using.
One pound of worms can eat about one pound of food scraps daily. But you don’t want to overfeed them and risk their overall health. To be safe, feed them every 2-3 days.
The day after a feeding, take a look inside the container and pay attention to how much food is left between feedings. If there’s a lot of food left, skip the next feeding and let them eat down what they already have before adding more.
It’s important to not overfeed your worms. If too much food is left uneaten, it will rot and cause odor and attract pests. A healthy bin that receives the proper amount of feedings won’t smell.
It’s equally essential to not let your worms ever run out of food. It will take a little time to find the right feeding schedule. Keep an eye on what’s left between feedings and make adjustments as needed.
All the food scraps that you feed your worms should be cut into very small pieces. The smaller the pieces, the faster the decomposition.
Most new wormery owners worry about fruitflies and rightfully so. In reality, if you feed the worms properly you will never see a single fly.
Make a hole in their container bedding and place the food into the hole. Now cover the food with bedding. This keeps all flies from being attracted to the bin.
Add a handful of damp paper or cardboard torn into small pieces with each feeding to maintain a good balance.
The foods worms eat come in two types:
-
- Green (fresh foods, which are high in nitrogen)
- Brown (paper foods, which are high in carbon).
Step 6: Proper Maintenance For Happier Worms
All things in life require maintenance, worms are no different. To maintain your worm bin, you will want to fluff up the bedding regularly to aerate it thorough. Worms need oxygen like any other living creature.
The bedding should feel like a damp sponge. If it feels dry, mist the paper until you get that dampness feel.
If the bedding is too wet, add some dry bedding. Remove any liquid in the tray under the bin regularly (be sure to save it).
The worm compost will be brown, crumbly and smell earthy when it is ready to harvest.
To harvest the worm compost, scoop out the amount you require and pick out any worms and put them back into the bin. If you have extra worms or worm compost, you can use them to start another bin or give them to friends to start their own bin.
Add more damp bedding after each harvest. Be sure that your worm bin is moist, dark and not exposed to extreme temperatures.
Now that your worm bin is set up and the worms are working hard for you, all you need to do is to keep them fed and in a dark, moist environment. Do that, and you’ll have wonderful worm compost to nourish your houseplants and container gardens in no time.
Enjoy your new worm bin, your plants definitely will.
List of Supplies You Need to Make Your Worm Bin
-
- 10 gallon opaque/solid colored storage container with lid
- Paper, cardboard or paperboard (a lot)
- Plastic tray to put under the container (to catch drainage)
- Garden soil (be sure it doesn’t contain any pesticides or chemicals)
- Hand shovel
- Spray bottle
- 1 pound of Red Wriggler worms
List of Safe Green and Safe Brown
Safe Green
-
- Fruit scraps
- Vegetable Scraps
- Coffee grounds
- Tea bags
- Stale bread
- Eggshells
- Dead pant material from houseplants
Safe Brown
-
- Newspaper (no shiny ads)
- Office and printer paper
- Corrugated cardboard
- Toilet paper
- Paper towel rolls
- Cereal boxes
- Soda cases
Unsafe Food Items To Avoid
- Citrus
- Dairy
- Fats
- Garlic
- Meats
- Oils
- Onions
- Prepackaged Foods
- Processed Foods
- Salty or Spicy Foods