Living a greener life is becoming more important for people and the planet. And having a compost bin in your backyard is a great (and considerable) first step towards ensuring a healthier planet for your family’s future generations. A list of the benefits composting will have for you and the environment is provided below.
Composting is easy. In fact, it only requires you to do some simple maintenance while the bacteria, fungi and other microorganisms will do the rest.
You let those tiny workers do their jobs, and they’ll reward you with a natural, chemical-free and nutrient dense fertilizer for your gardens, lawn, landscape and potted plants.
Use this guide to help you set up your backyard compost bin and take that step forward.
Setting Up The Compost Bin
The first thing you need to do is figure out what size bin you want to have.
If you have a small family, choose a smaller bin (at least an 18 gallon container) and if you have a large family, choose a larger bin (at least a 30 gallon container).
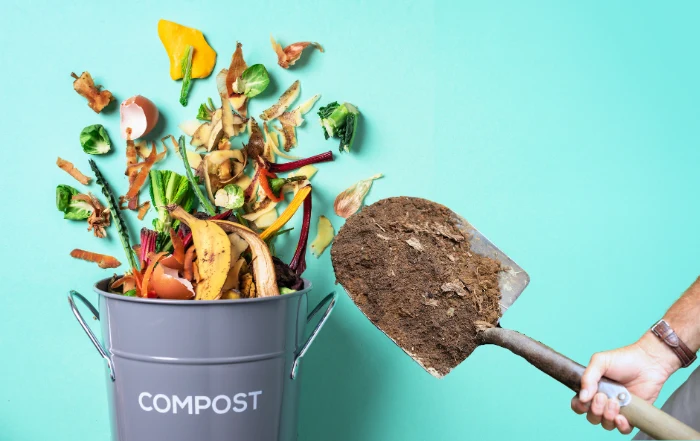
You can use any plastic container with a secure fitting lid as your bin, opaque/colored storage containers, garbage cans, or you can buy a compost bin at a garden supply store or online.
Select the option that works best for you, any of them will work just fine. The place you decide to keep your bin should be shady and out of direct sunlight. You can also keep your bin in the garage or storage shed. If you do keep your bin in the garage or shed, it’s recommended to place a tray under the bin to catch any of the extra liquid that will drain out of the bottom of the bin.
After all, you don’t want to lose that precious liquid. There’s a reason it’s widely known as compost tea, as it’s a very beneficial fertilizer for your gardens, landscape and houseplants (be sure to dilute the tea before using).
Setting Up Your First Container
1. Start by preparing your container.
To prepare your container, you will want to drill air holes placed 1–2 inches apart using a 1/2 inch drill bit along the bottom, the lid and at the top of all sides (about 2 or so inches from the top edge).
It’s a good idea to attach some black plastic window screening across the holes using a waterproof silicone sealant (like they use in aquariums).
This helps keep the air holes from becoming clogged with compost and allow moisture to drain out from the bottom without restricting airflow.
Let the sealant dry completely before continuing to set up your bin.
You can use this time to gather and prepare your composting materials. A list of the materials that you can compost is provided below.
2. Time to lay down some twigs.
After the sealant has dried, place a layer of twigs (about 2 inches deep) along the bottom of your bin, these provide a space for excess moisture to drain away from the compost which helps keep the compost from molding.
3. It's time to add the source materials.
Now you can start to add your compost materials.
The materials are divided into two types; Green Materials and Brown Materials.
The brown materials are items that are wood-based or fibrous and provide an energy source for the microorganisms in the bin.
The green materials, such as vegetables and fruits, provide a source of amino acids and proteins that are needed by the bacteria and fungi in the bin. It’s important that the ratio of brown and green materials is correct for the composting process to work properly
The recommended ratio is 2/3 brown material and 1/3 green material. It’s important to cut or shred all of your compost materials into small pieces to allow them to be broken down easier.
You will want to place a layer of brown material about 3 inches deep, then a layer of green material about 1 inch deep, and keep alternating until your bin is about 1/2 full.
At this time, use the mist setting on your hose nozzle or spray bottle to moisten the layers until they are
Keep layering materials until you run out of materials or your bin is full. Be sure to use brown material as the top layer, you don’t want to leave food waste in the open, this will smell and attract pests.
Moisten the final layers, place a lid on your container and put the bin in the area you wish to keep it.
Now the composting begins. Check your bin frequently to be sure it’s moist, mist if it appears dry. And if it seems too wet, add more brown materials.
Anytime you add more green materials, dig a trench and place the material in the trench and cover completely.
It’s best to add some brown material anytime you add green material, just mist the brown material lightly. After about 2 weeks, you will need to either shake your bin (if it’s a smaller bin), or turn the compost with a shovel.
This aerates the compost and speeds up the composting process. Do this every two to four weeks.
More To Discover
- Mushroom Farming: A Rewarding Hobby for the Green Thumb Enthusiast
- They’re Using Dirt To Power Fuel Cells! Soil-Based Microbial Fuel Cells Offer Nearly Limitless Energy
- 21 Best Drought-Resistant Vegetables to Grow in Your Garden This Season
- France Just Made Composting Mandatory And It’s Expected To Make A Big Difference
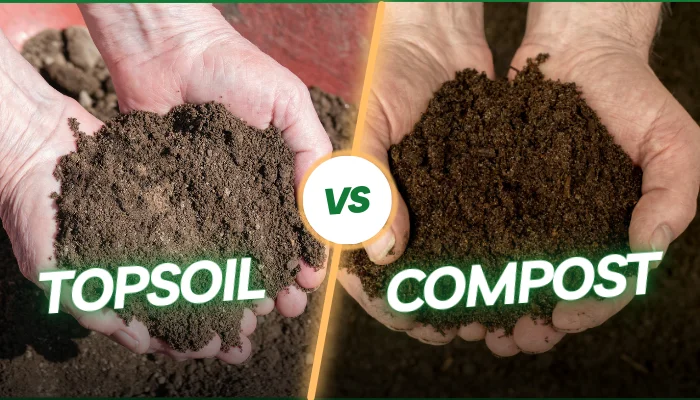
The composting process takes about 3 months, when the compost is ready to be harvested, it will look like a rich, dark soil and have an earthy smell.
When harvesting, be sure to keep your bin 1/3 full to keep the process going, otherwise you will have to wait for the process to start all over again.
The Many Benefits of Composting
For The Home
- Helps retain moisture in your lawn
- Promotes healthy plant growth
- Promotes healthy lawns and landscapes
- Eliminates the usage of chemical fertilizers
- Saves water (helps soil retain water)
- Reduces your carbon footprint
- Reduces greenhouse gases by keeping food wastes out of landfills
- Reduces the amount of trash
For The Environment
- Helps soil retain and absorb water
- Improves soil health
- Helps reduce the number of contaminants that reach ground water by acting as a filter for rainwater
- Helps control erosion
- Helps reduce greenhouse gases
- Helps storm water management
- Promotes healthy plant growth
- Helps combat climate change
- Reduces amount of trash in landfills
List of Compostable Materials
Brown Materials
- Shredded Newspaper (no ads)
- Office or School Paper
- Corrugated Cardboard (not glossy coated)
- Paper Towel, Wrapping Paper and Toilet Paper Rolls
- Tree Bark, Fall Leaves, Pine Cones, Twigs and Small Branches
- Straw
- Pine Needles
- Used Coffee Filters
- Pressed Paper Egg Cartons
- Sawdust (from untreated wood only)
- Brown Paper Lunch or Shopping Bags
- Wood Chips
- Tissues and Paper Towels (should not have oils or chemicals on them)
Green Materials
- Fruits and Vegetables
- Citrus and Melon Rinds
- Coffee Grounds
- Tea Leaves and Paper Tea Bags
- Houseplant Trimmings
- Weeds that have not gone to seed
- Grass Clippings
- Deadheaded Flowers
- Dead Plants (be sure they are not diseased)
- Seaweed
- Cooked Plain Rice
- Cooked Plain Pasta
- Old Dry Pasta
- Stale Bread
- Corn Husks
- Sod
- Garden Trimmings
- Eggshells (rinse clean first)
- Old Spices and Herbs
- Manures from Rabbits, Goats and Guinea Pigs
List of Things Not to Add to Compost Bin
- Raspberry or Blackberry Brambles
- Long Twigs or Large Branches
- Pet Droppings (Cat or Dog)
- Animal Products (meat, bones, fat, fish or dairy products)
- Coal Ash
- Colored or Shiny Paper
- Any Chemicals (herbicides, pesticides, fungicides)
- Diseased Plants
- Weeds that have gone to seed
- Plastics
- Pressure Treated Woods


